Saturday, November 20, 2010

New ATC

Here is another ATC made by moi. The theme of this swap: Zodiac Series #11 - Scorpio.
My swap partner's profile says that she doesn't care about horoscopes and loves everything vintage, that's why I put my effort to make this Scorpio as vintage as possible. Take a look.

What do you think?

Sincerely,


Friday, November 19, 2010

Shampoo Bottle Wreath Tutorial


As crazy as it may sounds that's what it is - My Shampoo Bottle wreath.
For a long time I've had my collection of empty shampoo bottles.


The colors were so pretty that I didn't want them to go to my recycling bin. I was desperately looking for an idea on how to use a shampoo bottle in any craft project but wasn't successful, and then I saw this beautiful wreath from Williams-Sonoma....

Bay Leaf Wreath

I simply fell in love with the shapes of bay leaves and then I've got an idea.... I still don't understand how my brain connected shampoo bottles and bay leaves but it did... I've decided to slice my shampoo bottles and cut out "bay leaves" and since my bottles had "autumn" colors I thought it should work for Thanksgiving Decor. Why not?

First I cut off the top of the bottle


Then I cut along this red line and around the bottom to open up the main body part.


When it's all open - it is super easy to cut out "the leaves"
That's how they look like!


Then I've decided to use the tops of the bottles.....


You'll need to help flower "petals" to open up by pushing them against their natural curve.

Note. Since I am having a lack of storage most of my items have to be flat in order to fit into my garage cabinets, that's why my wreath is going to be flat as well.

I've cut out two cardboard circles and glued them together.


(As you can see, I am using old cardboard box)
Then, I wrapped an old plastic tablecloth (leftover from my Halloween decor) around


and your base is ready!

Now that you've got all components - get your hot glue gun ready, and let's rock-n-roll!


Start with flowers first, I've decided to cut off the spout to make my flowers sit closer to the base of the wreath and hide connection points.

This is my half way in the making and it took only 5 minutes to get here:)


5 minutes later, I've got it all done


Few finishing touches, like pom pom hearts of the flowers


and a piece of ribbon and we are done.


Reduce, reuse, recycle! works all the time!

This wreath is my way of saying "Thank You!" to our Mother Earth.

Be thankful and have a great day!


I am sharing this project on the following link parties


Garden full of thanks - Stepping Stones Tutorial

I have been thinking about this project for awhile. I've been collecting plastic containers from food and grocery packaging in my garage for 2 months and bought a 60 lb bag of concrete for $4.65 at local Home Depot but couldn't start the project..... During our last trip to Sedona, I finally got that push that I needed to start the project. Here is the moment


My daughter was simply mesmerized by colorful pieces of glass embedded in concrete and then I knew we have to do it.

Next morning, I've got everything out and we started.....


Concrete is a very easy but also a very tricky thing. You need to get a feel of concrete: it should be not too thick and not too thin. Here is an example of how "too thick" looks like


Don 't worry it's fixable - just add a little bit of water. By a little bit I mean a little bit- 1 table spoon at a time and stir, stir and stir!

The most successful recipe for my mixture was 10 parts of concrete to 3 parts of water.
That's how it looks


When you've got the right consistency pour it into containers


Then we've got pieces of mosaic tile, glass marbles and etc. for embellishing. Our theme - "things we are thankful for". I thought it would be a good idea to embed our thanks into concrete and keep it in the garden as a constant reminder. Here is what we came up with, with my three year-old in charge:) I guess summer was her brightest memory:)


We pushed mosaic pieces into concrete creating different images and let it sit outside for 24 hours (our temperature outside around 65 F)

that's how it looks when it's ready to be taken out of the form - edges are dry and separated from the form and concrete has light grey color.


and that's how it looks all finished and in the garden.


I still have half a bag left for may be more "thanks" - will see.

Have a great day.

Wednesday, November 17, 2010

Autumn in Sedona


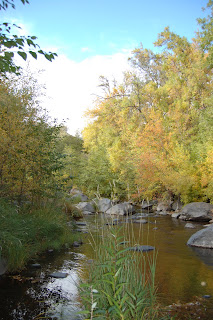
In my previous post I've been talking about how much I miss Autumn Foliage, well my prayers have been heard and I finally got a chance to witness Autumn at its best - Autumn in Sedona.


I am so thankful for this opportunity to see all my favorite colors that Mother Nature so generously creating for us. I hope you are enjoying this beatiful season as mush as I do.
Have a great day!

I was featured!


All my hard work for Halloween didn't get unnoticed (Bragging) My Halloween Wreath has been featured on

Featured Button"

Thank you so much for showing my project - I am thrilled! Santa's Gift Shoppe is a great Blog with fun link party. If you have time, please stop by.
Sincerely,


Tuesday, November 16, 2010

Bits and Pieces Part 3

I've learned really well over the past few months that for everything planned there is a big force of unplanned that could overpower your agenda. That's what happened to me. All my planned have been postponed for a week and that's life
Now back to catching up (smile)
If you are like me and have something like this - mismatched family treasures


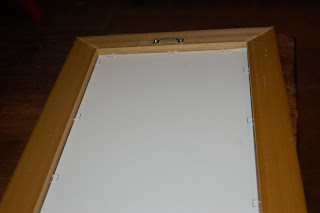
and something like this - an old framed poster (I happen to have two)

You may very well be interested in combining these two items in order to create something new. Take a look!
First you need to remove your framed "art" and get yourself a frame.


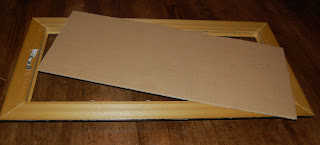
I have used my old "art" piece as a template for the new cardboard backing for my new creation


Then I've added some burlap to the cardboard using hot glue to create the background. I've cut up a piece of burlap slightly larger than the piece of cardboard in order to stretch and line-up while working with hot glue.


When everything has been glued and set - I've trimmed the extra fabric. Put your cardboard/burlap creation back in the frame and using the same hot glue attach your objects (spoons) in some sort of pattern. Note: hot glue can be easily removed from the spoon by placing the spoon in a hot water (just in case if you are afraid that this application can damage your collection)


Tah Dah!


I think it works really well for some trendy Homey Touches. I hope you will try it - it is really easy.

Sincerely,
I am linking this post to these fun link parties