Monday, June 21, 2010

Gift Bags Project

My daughter's 3rd (can't believe it!) Birthday in going to be this week and it means everything needs to be ready on time. Birthday Theme - Ocean and Sea Creatures.

Today we are doing a Gift Bag for Party Favors.

Materials you will need:
Lunch Brown Bags
Pencils
Pages from Magazines with Water Images
Sea Shells
Hot glue gun
Yarn in "Water" Colors
Hole Punches
Punches with Sea related Images
Glitter paint in "Water" colors

Let's Begin! Fold inside the top of the Brown Bag for about 1 " or so
Punch holes to accommodate future ties
Cut yarn into strips long enough to to tie a bow and decorate the ends with mini sea shells of your choice attaching them with hot glue.
Draw a basic sea scape using Crayons. Brush over some glitter paint to add dimensions.
Punch Sea Creatures or cut out from magazines and glue them over the Sea Scape to create an underwater scene.

For the next set of ties, do the same thing as before but for the decorations we are going to use a different trim. Punch few rounds out of magazines.

Then punch a sea creatures of your choice. Put a contrasting color craft paper behind your punch circle and we've got a new set of trims for your Favor bags:)

Last touch, add a Fish Shape Cut Out on top of the bag with initial of the guest
and you are done!
Tomorrow we are going to be talking about Favor Bag Contents:)
Happy Monday everyone!

Wednesday, June 16, 2010

Something old from something new


Today we are going to make something old from something new and we are going to use that last piece of fabric that I’ve got left from my previous project.

This is a Picture Box that I’ve received as a gift few years ago.

It was not my style and the size doesn’t fit the amount of pictures that I have. We are going to do a makeover for this client of ours.

Let’s go!

One coat of primer

Lots of coats of paint and sandpaper to distress

Old wallpaper sample to line the shelves

Old button to make a cute drawer pull

And we are done. Well, almost…. In my previous post in this Blog, I've had a dilemma on how to use the last piece of fabric. Finally, I have an idea!

Let’s make a pin cushion (no more pieces of this fabric flying around) and we’ve got a perfect sewing chest.

Something old from something new! Love it!

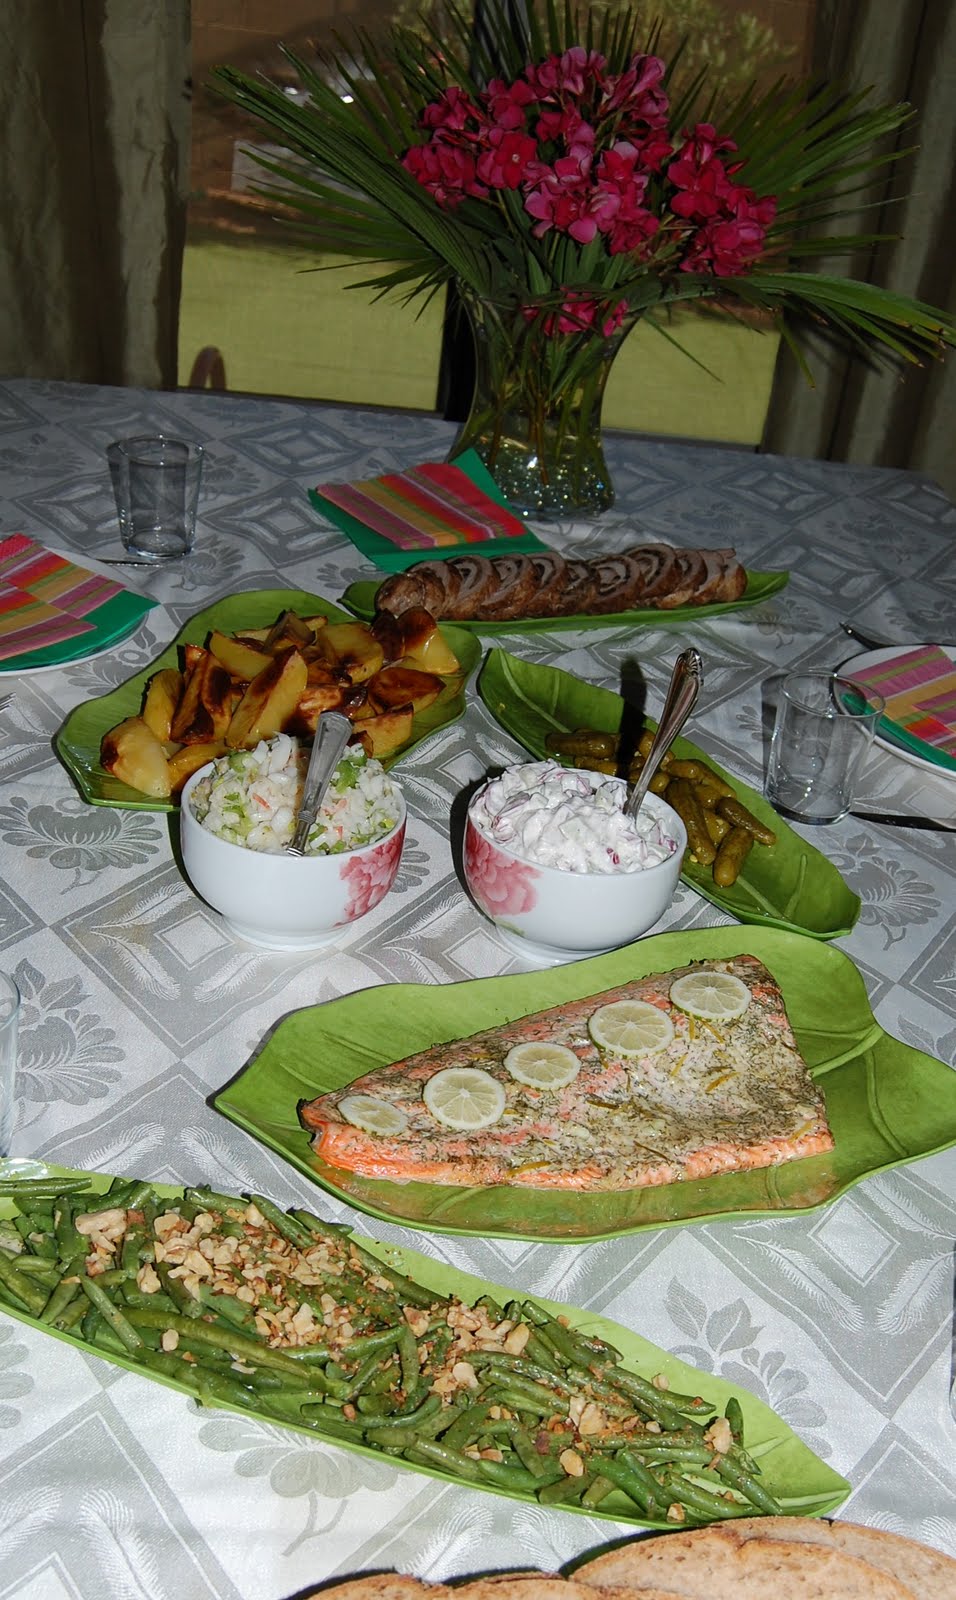
Today's project - Family Dinner


I am having my wonderful Brother-In-Law and Sister-In-Law for dinner. Nothing is better than a good company and they are simply a pure joy.
We are going to have-
Seafood Salad - shrimps, green apple, celery, green scallions in Lime/Avocado Oil Dressing
Red Radishes/Cucumber Salad with Sour Cream and Lemon Juice Dressing
My Sister-In-Law brought a wonderful homemade Pork and Mushroom Roll as an appetizer
Oven Baked Salmon marinated in Mayonnaise, Dijon Mustard, Lemon Juice, Fresh Dill and Sesame Seed Oil
Roasted Potatoes
Green Beans with Walnut Dressing
and accompanied by Californian Pinot Noir . I call it a project, wouldn't you?
Total cost $40.00 including the wine. Not too bad, but it will not count for my 365 days 365 Days No Money Spend Run:(

Tuesday, June 15, 2010

The simplest and the dearest


This is probably the easiest and at the same time the dearest projects of mine. In our busy and stressful days we sometimes overlook the beauty of the simple things that surround us.
I woke up early in the morning to a bird singing outside. It was so peaceful and cheering at the same time. It made me go to the backyard and look around, I got a fresh morning breeze in my face and felt.... happy. I wanted to celebrate this feeling and made this bouquet out of my backyard plants.
I hope these plants will uplift your spirit as well and you will find joy in something simple, in something easy that is next to you and I hope you will smile....

Friday, June 11, 2010

Shaun the Sheep - Toy Tutorial


Another character from the cartoon that is our family favorite - Shaun the Sheep.
We all love Shaun who is the leader of the squad, so let's make one.
(This is the most detailed tutorial that I've ever done)

MATERIALS:
Cardboard
Yarn (In my project, I am using 99 cents Store find – white yarn)
2 black chenille stems
2 wiggle eyes
Black Felt (you don’t need a lot, so any leftovers are welcome)
Felt Paint in Red
Costume and Mask Glue
Scissors

Step 1

You will need to trace two larger circles on a cardboard, of if the cardboard allows you to be folded in a half, then fold it and trace only one.

As you can see I am using a regular glass

Step 2

Now, in the middle of the larger circle, you’ll need to trace a smaller circle

I am using a bottle water cap

Step 3

When you are done tracing - it should look like that.

Step 4

Cut the donut shapes out. You’ll get two pieces looking like that.

Step 5

Wrap it up! Put two cardvoard pieces together. Starting from the outside edge and going in and around, start wrapping the donut by using long pieces of yarn. It is a lengthy part of the project, so pick a good movie or show on TV and take it away!

Step 6

When the middle opening of the donut will become very small insert two chenille stems
Step 7
continue wrapping the yarn (using large craft needle, in order to go through the center) until the center is completely covered
Step 8

Let the magic begin! You need to start cutting along the outside edge in order to get to the cardboard.

Step 9

As soon as you’ve been able to expose some of the cardboard, insert your scissors between two pieces and keep cutting along the outside edge.

Step 10
When you are done it should look like this
Step 11

Tie the middle part very tightly in order to hold your pom pom together.

Step 12

Remove the cardboard pieces

Step 13
My favorite part - get the fruit of your labor
Bend chenille stems in order to create any shape of legs that you may like
Step 14

Let’s make a head.
I am using leftover piece of black felt . Folded in a half, it measures about 2”
Step 15

Cut the pear shape.

Step 16

Glue two pieces together and set aside to dry
Step 17

Let’s make ears.
In my case, I am using leftover piece of felt.
I cut out two pieces 1 ¼” long and ¾” wide in a leaf like pattern, with wider base.

Step 18

Apply a small drop of glue to the center of the wide base.
Step 19
Press them together by using alligator clips and set aside to dry.
Step 20
Let’s play with eyes.
It is amazing how many face expressions you can create by moving eyes around. Have fun!
After you have settled on a certain face expression, glue wiggle eyes to the head and set aside to dry.
Step 21

Let’s work on hair style
Using white yarn, I’ve created few loops around the forehead, secure each loop with a tight knot.

Step 22
Cut each loop in the middle.
Step 23
Fluff it up and trim side pieces in order to get nice rounded look.

Step 24

Glue ears to the head.
Step 25

Let’s draw a mouth.
My paint was very thick, so I’ve put a little drop

Step 26

and then using a tooth pick created pillow lips with adorable smile.

Step 27

Attach head to the body.

Step 28
Put a generous amount of glue where the head you think should be and press them together. Let the glue dry.
Step 29
Here is your new fuzzy friend! The weekend is ahead of you and depending on how busy you are, you can easily make Shaun or the whole squad:) Have a nice weekend!