Friday, November 19, 2010

Garden full of thanks - Stepping Stones Tutorial

I have been thinking about this project for awhile. I've been collecting plastic containers from food and grocery packaging in my garage for 2 months and bought a 60 lb bag of concrete for $4.65 at local Home Depot but couldn't start the project..... During our last trip to Sedona, I finally got that push that I needed to start the project. Here is the moment


My daughter was simply mesmerized by colorful pieces of glass embedded in concrete and then I knew we have to do it.

Next morning, I've got everything out and we started.....


Concrete is a very easy but also a very tricky thing. You need to get a feel of concrete: it should be not too thick and not too thin. Here is an example of how "too thick" looks like


Don 't worry it's fixable - just add a little bit of water. By a little bit I mean a little bit- 1 table spoon at a time and stir, stir and stir!

The most successful recipe for my mixture was 10 parts of concrete to 3 parts of water.
That's how it looks


When you've got the right consistency pour it into containers


Then we've got pieces of mosaic tile, glass marbles and etc. for embellishing. Our theme - "things we are thankful for". I thought it would be a good idea to embed our thanks into concrete and keep it in the garden as a constant reminder. Here is what we came up with, with my three year-old in charge:) I guess summer was her brightest memory:)


We pushed mosaic pieces into concrete creating different images and let it sit outside for 24 hours (our temperature outside around 65 F)

that's how it looks when it's ready to be taken out of the form - edges are dry and separated from the form and concrete has light grey color.


and that's how it looks all finished and in the garden.


I still have half a bag left for may be more "thanks" - will see.

Have a great day.

Wednesday, November 17, 2010

Autumn in Sedona


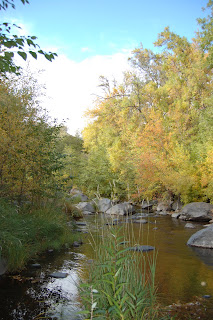
In my previous post I've been talking about how much I miss Autumn Foliage, well my prayers have been heard and I finally got a chance to witness Autumn at its best - Autumn in Sedona.


I am so thankful for this opportunity to see all my favorite colors that Mother Nature so generously creating for us. I hope you are enjoying this beatiful season as mush as I do.
Have a great day!

I was featured!


All my hard work for Halloween didn't get unnoticed (Bragging) My Halloween Wreath has been featured on

Featured Button"

Thank you so much for showing my project - I am thrilled! Santa's Gift Shoppe is a great Blog with fun link party. If you have time, please stop by.

Sincerely,


Tuesday, November 16, 2010

Bits and Pieces Part 3

I've learned really well over the past few months that for everything planned there is a big force of unplanned that could overpower your agenda. That's what happened to me. All my planned have been postponed for a week and that's life
Now back to catching up (smile)
If you are like me and have something like this - mismatched family treasures


and something like this - an old framed poster (I happen to have two)

You may very well be interested in combining these two items in order to create something new. Take a look!
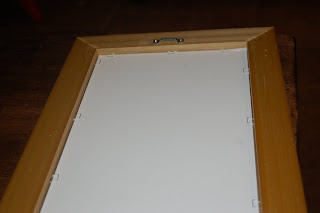
First you need to remove your framed "art" and get yourself a frame.


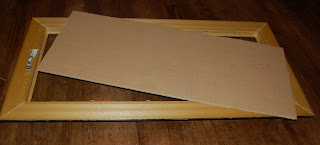
I have used my old "art" piece as a template for the new cardboard backing for my new creation


Then I've added some burlap to the cardboard using hot glue to create the background. I've cut up a piece of burlap slightly larger than the piece of cardboard in order to stretch and line-up while working with hot glue.


When everything has been glued and set - I've trimmed the extra fabric. Put your cardboard/burlap creation back in the frame and using the same hot glue attach your objects (spoons) in some sort of pattern. Note: hot glue can be easily removed from the spoon by placing the spoon in a hot water (just in case if you are afraid that this application can damage your collection)


Tah Dah!


I think it works really well for some trendy Homey Touches. I hope you will try it - it is really easy.

Sincerely,
I am linking this post to these fun link parties


Tuesday, November 9, 2010

Bits and Pieces Part 2

You know how popular clear glass containers that display objects - you can see them everywhere. They can be pretty pricey!

Williams-Sonoma Small Classic Glass Hurricane

These ones from Williams-Sonoma starting from$58.00

Well, I don't want to pay that much. Actually I don't want to pay anything at all! Here is what I did....


What is it? This is my Pedestal Beverage Jar that I've used so much during hot summer days


but now it serves as a brand new display for my favorite artichokes and the best part - No Money Spend!

Have a great day!


Monday, November 8, 2010

Bits and Pieces


Did I forget my Blog? Of course not! I was very busy working really hard on a big project that I will reveal at the end of this week, but for now I want to show you some of bits and pieces that will be part of my final look.
Here is a transformation on a dime. I went yard sale shopping with my girlfriend who is a pro. This is what I found for a dollar!!


I couldn't walk by this beauty - the detailing of this piece was screaming at me - "Take me home!" and so I did

After cleaning all the dust and dirt off, I put a coat of spray paint in Celery from Krayon.


Then I went back and added some glaze. You can see the area on a very left doesn't have any glaze and the area before it already have some - just to show you a difference.


Here is the final look.....


and here is the final place.....


I'll call it my "Pantry Topper"


Have a great day and come back for another part of Bits and Pieces, as well as the large reveal....:)

Sincerely,

Monday, November 1, 2010

Creating Autumn

What do you do when you don't get to see beautiful Autumn foliage? You create autumn colors for yourself....
This project based on my previous post "Crazy Crayons" but with a new twist

First, you will need to make Crazy Crayons in Autumn colors


for which you will brake crayons


and bake them at 350 degrees for 10 minutes


and cool for an hour - here you have it


Now, the next step of the project. You will need an orange paper for printer and large real leaves of your choice.

You will need to work on a flat surface. Put the leaf down, paper on top and start rubbing over the area where the leaf is with Autumn Crazy Crayon. I am finding these Crayons great for my 3-year old. Her hands are small and bigger crayon is more comfortable to grab on while rubbing. Also, make sure you will secure the orange paper in order to prevent any unwanted paper moves that may affect the final results. It is so much fun to watch "the appearance" of the leaf
Here is what we've got after few experiments with different pressure


Now, let's think what can we do with these beautiful leaves?